
At a glance
Symptoms
- • Baked goods are consistently burning on the bottom or outer edges
- • Recipes are taking significantly longer or shorter than the stated time
- • An independent oven thermometer reads 15°F to 35°F different from your set temperature
- • Inconsistent results when baking delicate, temperature-sensitive items like soufflés or macarons
- • You recently moved to a higher elevation (like the Issaquah Highlands or Cascade mountains) and your old baking times are suddenly off
Common causes
- • Ensures food safety by cooking meats and poultry to the proper internal temperatures
- • Prevents wasted groceries and frustration from burnt or drastically undercooked meals
- • Compensates for the normal, gradual sensor drift that occurs as your oven's components age
- • Saves energy by preventing the oven from over-firing and running hotter than necessary
- • Gives you predictable, reliable results for holiday baking and everyday meal prep
Safety First — Read Before You Start
- •Never touch the heating elements or oven racks while the oven is hot without thick, heat-resistant oven mitts.
- •Do not attempt to physically bend, scrub, or move the oven temperature sensor probe inside the oven cavity; it is fragile and easily broken.
- •If your oven is gas, ensure you smell no gas before starting a long heating cycle. If you smell gas, turn the unit off, open windows, and call a professional immediately.
- •Do not use a standard meat thermometer to test oven air temperature; they are calibrated for internal food temperatures, not ambient air, and will give wildly inaccurate readings.
- •Always unplug the oven or flip the circuit breaker if you decide to inspect the physical temperature sensor or bake element, to avoid lethal shock.
Tools & supplies you'll need
- High-quality analog or digital oven thermometer ($10-$20)
- Notepad and pen for recording temperature readings
- Heavy-duty oven mitts
- Small flathead screwdriver or Phillips screwdriver (only required for older mechanical dial ovens)
- Flashlight (helpful for reading small numbers on a mechanical dial shaft)
Step-by-step instructions
Purchase and Position a Quality Oven Thermometer
Skip the bargain-bin thermometers found at the grocery store that have been sitting in your junk drawer for years. Acquire a high-grade stainless steel analog or digital thermometer featuring a high-heat probe (budget $15-$25). Place this tool precisely in the center of your oven rack—ensure it is spaced equally from the side walls, the back, and the front door. This central spot provides the most reliable measurement of the ambient heat used for your baking.
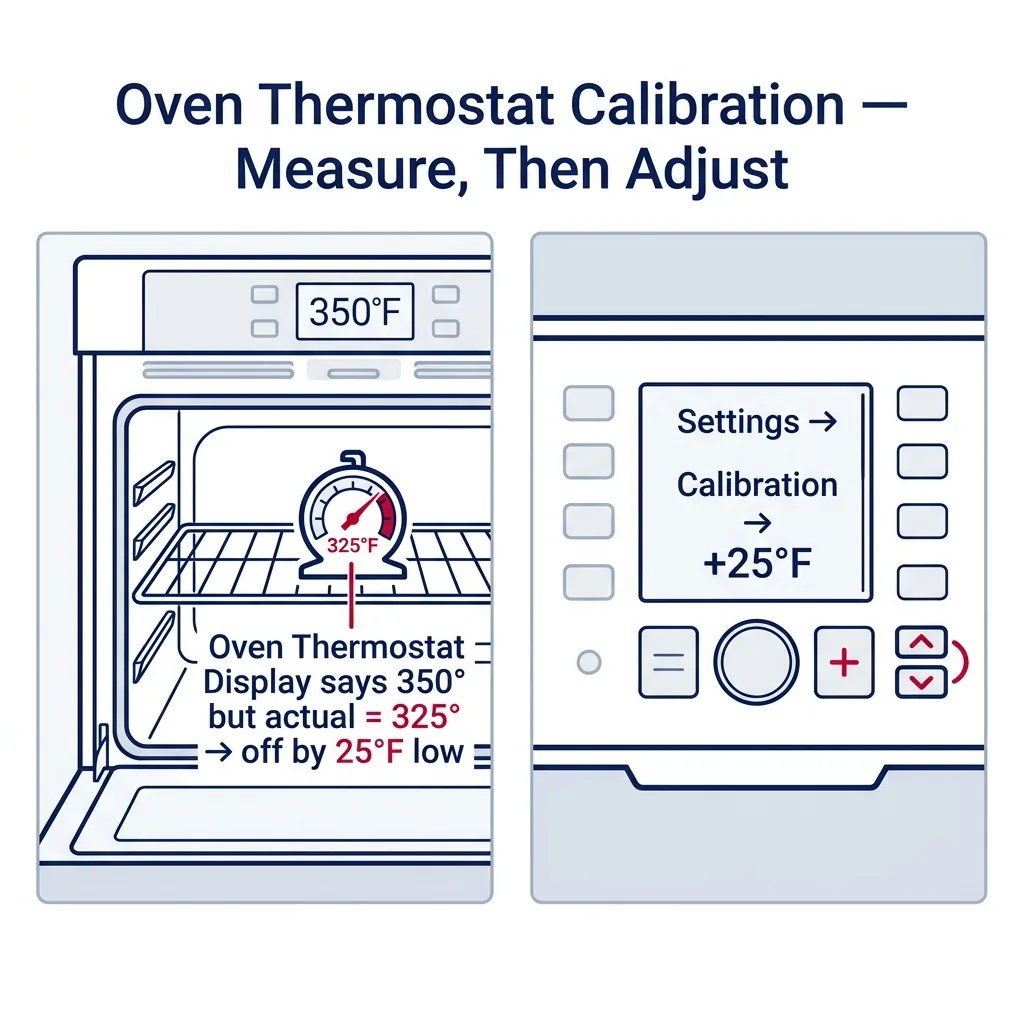
Tip: If using an analog model, orient the gauge toward the glass so you can verify the reading without disrupting the heat by opening the door.
Run the Initial Baseline Test
Clear your oven of everything except the racks and your thermometer. Close the door and set the unit to Bake at 350°F (175°C). Avoid using settings like Convection Bake, Roast, or accelerated preheat modes, as these engage different components that will invalidate your test. Once the preheat chime sounds, wait an additional 15 to 20 minutes. The oven naturally overshoots the target during the start-up phase to account for heat loss; waiting ensures the temperature stabilizes.
Tip: Keep the door closed throughout this test. Opening it causes a massive temperature spike or drop, which ruins your data.
Record Multiple Temperature Readings
Ovens don't stay at one exact temperature; they cycle to maintain an average. To find your true average, observe the thermometer through the glass and record the temperature at 10-minute intervals for at least 40 to 50 minutes total. Write these down on your notepad.
Tip: If the glass is cloudy or difficult to see through, use a flashlight to illuminate the dial, or crack the door for just a second or two to check the reading.
Calculate the Calibration Offset
Sum your recorded temperatures and divide by the number of readings to get your average. If your average was 330°F while the oven was set to 350°F, you need a +20°F offset. Most modern ovens accommodate adjustments up to ±35°F. If your variance exceeds this, you likely have a failing sensor or a weak bake element rather than a calibration issue.
Tip: Wildly swinging readings suggest a failing control board or thermostat that requires professional intervention.
Adjust an Electronic Control Board (Modern Ovens)
Every brand has a unique sequence for entering calibration mode. Often, this involves holding the 'Bake' button for 3 to 5 seconds until the screen displays '0' or '00'. Other models may require using 'Settings' or 'Options' menus (refer to your manual or our brand notes). Once in the mode, input your calculated offset using the number pad or arrows, then press 'Start' or 'Enter' to save the adjustment.
Tip: Always check your owner's manual if the standard 'Bake' hold method does not trigger the adjustment menu.
Adjust a Mechanical Thermostat Dial (Older Ovens)
For vintage units with a physical knob, turn the oven off and pull the knob off the shaft. On the back, you will see a metal plate held by small screws. Loosen these slightly—do not remove them. Rotate the plate to shift the pointer toward 'Hotter' or 'Cooler' according to your findings. Tighten the screws and replace the knob.
Tip: Snap a photo of the original screw positions before loosening anything so you have a factory reference point.
Verify the Calibration
Once the offset is applied, allow the oven to cool to room temperature. Afterward, repeat the baseline test: set to 350°F, wait 20 minutes after the beep, and check the thermometer. Your average should now be within 5°F to 10°F of your target.
Tip: If the readings are within the 5-10 degree range, your oven is successfully calibrated.
Brand-specific notes
Some brands have known design quirks worth knowing about before you start.
Whirlpool & KitchenAid
On many Whirlpool and KitchenAid models, you can enter calibration mode by pressing and holding the 'Bake' button for 5 seconds until the display shows the current offset. On newer touchscreen models, you'll need to navigate through the 'Settings' gear icon to 'Temperature Calibration'.
GE & GE Profile
GE ovens frequently use a two-button combination. You typically need to press and hold the 'Bake' and 'Broil' buttons simultaneously for 3 seconds until the display shows 'SF' (Special Features). Then, press 'Bake' again to access the temperature adjustment, use the number pad to set the offset, and press 'Start' to save.
LG
For most LG ranges, press and hold the 'Bake' button for 3 seconds. The display will show '0'. Use the number pad to enter the desired adjustment. To make the adjustment negative (cooler), press the 'Bake' button again to toggle the minus sign, then press 'Start'.
Samsung
Samsung ovens often require pressing the 'Bake' and '0' (zero) buttons at the same time for 3 seconds. On models with a dedicated 'Settings' or 'Options' button, press it repeatedly until 'Temp Adjust' or 'Therm Calib' appears, then use the arrows or keypad.
Bosch
Bosch 500 and 800 series ovens usually require entering the setup menu. Press and hold the 'Bake' button for 5 seconds, or press 'Settings' and scroll to 'Temp Offset'. Bosch limits the adjustment to ±35°F. If your oven is off by more than that, Bosch recommends replacing the PT500 temperature sensor.
Frigidaire
Press and hold the 'Bake' button for 6 seconds until 'UPO' (User Programmable Offset) appears. Use the up and down arrows to adjust the temperature. Press 'Start' to lock in the new setting.
What our techs see most often
We get a lot of calls from folks in the Issaquah Highlands and Spokane who think their oven is completely broken because their holiday baking failed. More often than not, the oven is just running 20 degrees cool due to normal sensor drift over the years, and a simple 5-minute calibration using the front keypad saves them a $150 service call.
When to call a professional
- → Your calculated temperature offset is greater than 35°F (indicates a failing sensor or weak bake element).
- → The temperature fluctuates wildly during a single bake cycle (e.g., dropping 100 degrees suddenly), which points to a failing main control board.
- → The oven takes longer than 20-25 minutes to preheat to 350°F, suggesting a burned-out heating element rather than a calibration issue.
- → You get an 'F-code' error on the display (like F3 or F4) indicating an open or shorted temperature sensor circuit.
- → You smell raw gas when operating a gas oven, or the bake burner fails to ignite smoothly.
Related Oven Troubleshooting
These troubleshooting guides cover problems this task can help solve.
Oven Broiler Not Working: Causes and Fixes
Oven Won't Heat: Troubleshooting Gas and Electric Models in the PNW
Fixing an Oven That Won't Complete a Self-Clean Cycle
Oven Smoking: Identifying Causes and Solutions
Why Your Oven Bakes Unevenly: Professional Troubleshooting Guide
Frequently asked questions
Why is my oven temperature fluctuating while baking?
It is completely normal for an oven to fluctuate. Ovens maintain temperature through a process called hysteresis, cycling the heating elements on and off. If you set it to 350°F, it may heat to 365°F, turn off, drop to 335°F, and turn back on. This is why taking an average of multiple readings over 40 minutes is crucial for accurate calibration.
What if my oven is off by more than 35 degrees?
Most electronic control boards max out at a ±35°F calibration limit. If your oven is consistently 50°F or 100°F off, calibration won't fix it. You likely have a faulty temperature sensor probe (a $20-$50 part) or a failing control board relay. Replacing the sensor is a common repair that typically costs $150-$250 if done by a professional.
Can a bad bake element cause inaccurate temperatures?
Yes. If your bottom bake element has a partial break or increased electrical resistance, it won't output the correct wattage. The oven will struggle to reach or maintain temperature, mimicking a calibration issue. A new bake element usually costs between $30 and $80, plus labor.
Do I need to recalibrate my oven if I live at a high altitude?
If you live in higher elevation areas in Washington & Oregon, like Big Bear or Lake Arrowhead, water boils at a lower temperature and air is thinner. While you don't necessarily need to recalibrate the oven's baseline temperature, you will need to adjust your baking times and temperatures per high-altitude recipe instructions. However, if you moved your specific oven from sea level to high altitude, checking the calibration is a smart first step.
How often should I calibrate my oven thermostat?
You generally only need to check calibration once every few years, or immediately if you notice a sudden change in how your baked goods are turning out. Oven sensors drift very slowly over thousands of heating cycles.
Need a technician in WA or OR?
If the fix above does not work, A-Fix Service repairs ovens across Washington and Oregon. $90 diagnostic visit.
Related Repair Guides
Why Your Oven Bakes Unevenly: Professional Troubleshooting Guide
If your cookies brown inconsistently, your cakes lose their shape, or your casseroles only bubble on one side, you are dealing with uneven oven heating. This common issue often stems from a failing convection fan, a drifting temperature sensor, a weak heating element, or simply how you load your pans. Most of these repairs can be completed in under an hour, and some require no parts at all.
Oven Won't Heat: Troubleshooting Gas and Electric Models in the PNW
When an oven powers on but fails to produce heat, it is one of the most frequent service calls we handle across Washington and Oregon. Whether you are dealing with the damp climate affecting electrical contacts in Seattle or hard water mineral buildup in Spokane, the diagnostic path differs significantly between gas and electric units. For electric ovens, a faulty bake element or sensor accounts for roughly 70% of issues. In gas models, a weak igniter is usually the culprit. Most repairs take 1-2 hours and cost between $30 and $180 for parts.
Oven Broiler Not Working: Causes and Fixes
When your broiler quits, searing a steak or finishing a casserole becomes a real headache. We break down the usual suspects—like failed gas igniters or burnt-out electric elements—to help you get your oven back in working order.